The short answer
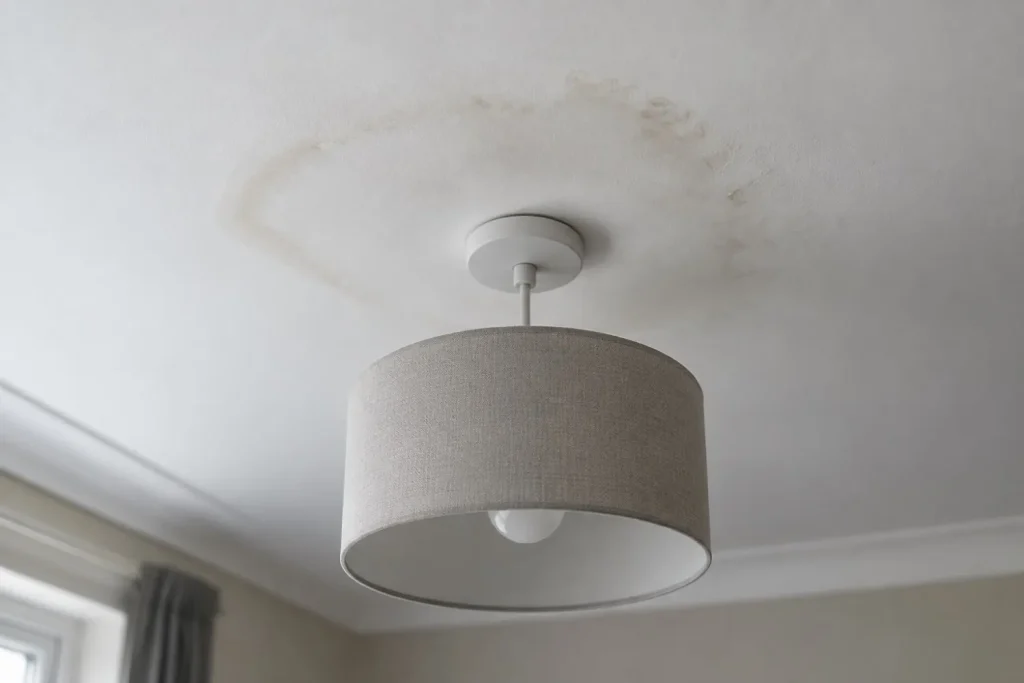
The early signs of water damage on ceiling surfaces appear well before an obvious brown stain does. In rough order: a faint halo visible only in raking light, a change in sheen or texture, hairline cracks radiating from one point, nail or screw pops, paint that feels cool or slightly soft, a musty odour with nothing visible, and a light fitting or smoke alarm that flickers or corrodes. That interval is where the cost of the whole job gets decided.
Key takeaways
- Catching a leak at the sheen-change stage is a paint job. The same leak at the sagging stage is a ceiling replacement. Nothing about the leak changed; only the elapsed time did.
- A torch held almost flat against the ceiling is the best free detection tool there is. Raking light shows texture and sheen differences that are invisible under a normal ceiling fitting.
- Thermal imaging shows temperature difference, not moisture. A cool patch is a question worth asking, not an answer.
- The season tells you the system. Appearing after rain points at the building envelope, after showers at plumbing or venting, in cooling season at HVAC condensate, and in a cold snap at an ice dam or a frozen line.
- Look in the six places that account for most of these: under bathrooms, under kitchens, at roof valleys and penetrations, along exterior walls, and at any HVAC plant sitting in an attic or upper cupboard.
On this page
- Why the early window decides the cost
- The signs in the order they appear
- Raking light, the best free tool
- Cracks, pops and other movement signs
- A musty odour with nothing to see
- Light fittings and smoke alarms as sensors
- Where to look, in order of yield
- What the season tells you
- Homeowner tools versus professional tools
- What thermal imaging does and does not show
- A ten-minute routine worth repeating
- What to do once you have found something
- Questions people actually ask
Almost everything written about ceiling water damage starts at the point where a brown mark is already visible. That is the late stage. Water reaches the painted face of a ceiling only after it has saturated the material from above and carried dissolved compounds through it, which takes volume or time or both. This page is about the period before that, which is the only period in which the outcome is still cheap.
Why the early window decides the cost
The relationship between detection time and cost is not gradual. It steps. A leak found while the board is damp but sound needs the source fixed, a short dry-out and some paint. The same leak found once the board has lost strength needs material cut out, insulation removed and a section replaced. The step happens because plasterboard does not degrade smoothly: the gypsum core absorbs, the paper facing delaminates, and structural capacity falls away over a fairly narrow range of moisture content.
The second column is the one worth reading twice. The difference between the top two rows and the bottom two is not a matter of degree. It is the difference between a decorating task and a construction task, and the only variable separating them is how long the water had.
Slow leaks are more expensive than fast ones
This is counterintuitive and it is consistently true. A supply line that fails outright dumps a great deal of water quickly, which means somebody notices within minutes and the damage is concentrated where it landed. A fitting that weeps a few drops an hour releases a trivial volume, goes unnoticed for months, and distributes that water through insulation, framing and sheathing continuously. The second one is the one that ends up as a full ceiling strip-out, despite having lost a fraction of the water.
The signs in the order they appear
The sequence below is the usual progression on a painted plasterboard ceiling taking on water slowly from above. Fast leaks compress it; very slow ones can stall at the first two for a long time.
| Order | Sign | What is happening in the material | How to check |
|---|---|---|---|
| 1 | A faint ring or halo visible only in raking light | Dissolved compounds are concentrating at the evaporation boundary, but not yet enough to read as colour under normal lighting | Torch held almost flat against the ceiling surface, lights off. |
| 2 | A subtle change in sheen or texture | The paint film has taken on moisture from the substrate and its surface reflectance has changed slightly | Same raking light. Look for a patch that reflects differently rather than one that looks a different colour. |
| 3 | Hairline cracks radiating from a single point | The board has swelled with moisture and moved against its fixings and its neighbours | Look for a common origin. Cracks from water radiate; settlement cracks tend to run along lines and joints. |
| 4 | Nail or screw pops | The board has swelled and shrunk, working itself off the fixing head | A row of pops along one joist line is a strong signal. Isolated pops are common and mean little. |
| 5 | Paint that feels cool or slightly soft to a fingertip | Evaporation is cooling the surface and the board behind has begun to lose firmness | Compare against an identical spot elsewhere on the same ceiling. Press gently. |
| 6 | A musty odour with no visible mark | Sustained damp in the void, with growth likely already under way on the hidden face | Strongest near the ceiling and worse in still air, for example first thing in the morning. |
| 7 | A light fitting or smoke alarm behaving oddly or corroding | Water has reached the electrical opening, which is frequently the lowest and easiest route out of the void | Visual only from the floor. Isolate the circuit before anyone goes near it. |
| 8 | A visible stain, then softness, then sag | Saturation. The material is at or past its structural limit | This is no longer the early window. See the urgency section on our water damage ceiling page. |
Raking light, the best free tool
Ceilings are lit from fittings mounted in them, which means they are lit from directly above the surface plane and almost nothing casts a shadow. That is precisely the lighting condition under which surface irregularities disappear. It is why a ceiling that looks perfect at night can show a clear halo when a torch is held against it.
The technique takes a minute. Turn the room lights off. Hold a reasonably bright torch flat against the ceiling so the beam runs along the surface rather than into it, then sweep it slowly across the area. Any change in texture, any slight depression, any difference in sheen becomes a visible band because it is now casting a shadow. The same approach finds fixing pops and hairline cracks that are invisible face-on.
What raking light shows that ordinary light does not
- Sheen differences. Paint that has absorbed moisture and dried often has a marginally different surface finish from the paint around it, which shows as a patch with a different reflection rather than a different colour.
- Very early haloes. The boundary ring forms before the fill of the stain does, so the first visible evidence is frequently an outline rather than a patch.
- Slight sagging between joists. A ceiling that has started to lose stiffness dips fractionally in the bays between fixings, which raking light picks up as regular banding.
- Old repairs. A patch someone made previously shows up clearly, which tells you the area has a history worth asking about.
Cracks, pops and other movement signs
Every ceiling cracks eventually. The useful skill is separating ordinary movement from moisture movement, because the two have different geometry.
| What you see | Moisture pattern | Ordinary pattern |
|---|---|---|
| Crack direction | Radiating outward from a single origin point, like a spider | Running along board joints, or in a straight line from a corner of a door or window opening |
| Crack company | Usually accompanied by a sheen change or fixing pops nearby | Usually alone, in an otherwise uniform ceiling |
| Fixing pops | Clustered, often several along one joist line, in one area of the ceiling | Isolated and scattered, common in the first year after construction as timber dries |
| Change over time | Progressive. Marking and dating the extent shows growth over weeks | Static. A settlement crack found last year is usually the same size this year |
| Joint tape | Lifting, bubbling or peeling at the seam, because the adhesive and the board have taken on water | Intact, with the crack running through the filler rather than the tape letting go |
Mark it and date it
This single habit is worth more than any tool a homeowner can buy. Draw around whatever you can see in pencil and write the date next to it. Come back in a week, after the next heavy rain, and again a month later. A mark that has not moved is a different problem from a mark that has, and no amount of staring at it on one occasion will tell you which you have.
A musty odour with nothing to see
An odour that has no visible source is one of the more reliable early signals, because odour escapes a void long before water works its way through to the painted face. Air moves between a ceiling void and the room through downlight cut-outs, loft hatches, extract fan housings and gaps around fittings, and it carries the smell of what is happening up there with it.
Treat it as a locator rather than a diagnosis. Walk the room slowly and find where it is strongest, check whether it is worse near the ceiling than at waist height, and notice whether it is worse in still air first thing in the morning or when the heating comes on and air starts moving through the void. Those three questions usually narrow the search to one part of one room.
We are describing this as a detection signal for a building problem and nothing else. Questions about what any of it means for the people living there belong with a professional, not with a web page.
Light fittings and smoke alarms as sensors
Ceiling electrical openings are, structurally speaking, holes in the lowest surface of the void. Water collecting on top of a ceiling finds them, which makes the fittings mounted in them useful early indicators, and also makes them the reason to be careful.
- A downlight that flickers or trips a circuit with no other explanation is worth checking as a moisture question before it is treated as a lamp question.
- Visible corrosion or discolouration on the rim of a fitting, or staining on the inside of a diffuser, indicates water has been reaching it.
- A smoke alarm chirping or false-alarming can indicate moisture in the sensing chamber. It is also the most common symptom of a flat battery, so check the simple thing first.
- Water visible inside a light fixture or diffuser is past the early stage entirely. Isolate that circuit at the consumer unit, not at the wall switch, and keep away from it.
- An extract fan housing with staining around it frequently indicates the fan is discharging into the void rather than outside, which is a cause rather than a symptom.
The extract fan case is worth its own mention
A bathroom extract fan that terminates in a loft instead of through the roof or a wall pumps warm, saturated air directly into a cold void every time someone showers. The water condenses on the cold underside of the roof and rains back onto the ceiling below. It presents exactly like a roof leak, except that it correlates with showering and with cold weather rather than with rain. It is common enough in retrofitted bathrooms to be worth checking before anyone starts pricing roof work.
Where to look, in order of yield
Ceiling leaks are not randomly distributed. Six locations account for the large majority, and a ten-minute check covering all six is far more useful than an hour spent looking at whichever ceiling happens to be overhead.
| Location | What is above | What to look for specifically |
|---|---|---|
| Directly below a bathroom | Shower tray or pan, waste trap, supply lines, and the floor junction at the edge of the wet area | Check under the shower footprint and under the trap rather than in the middle of the room. Check whether it changes with use. |
| Directly below a kitchen or laundry | Sink waste, dishwasher and washing machine connections, and appliance overflow routes | Look under the appliance positions and the sink run. Braided supply hoses are a common failure point. |
| Top-floor ceilings under roof valleys | The junction where two roof slopes meet and concentrate runoff | Valleys carry far more water than plain roof area, so a failure there produces volume quickly. |
| Below roof penetrations | Vent stacks, chimneys, skylights, aerials and solar fixings | Every penetration is a hole in the roof relying on a seal or a flashing. Check the ceiling under each one. |
| Along exterior walls and at the wall-to-ceiling junction | Gutters, eaves, fascia, and in cold climates ice dams | Stains here follow storms from one direction and sit at the junction rather than in the field of the ceiling. |
| Below any HVAC plant in a loft or upper cupboard | Air handler, condensate drain pan, condensate line, and uninsulated ductwork | Check the pan is not standing full and the drain line is not blocked. This is a cooling-season pattern. |
What the season tells you
Timing is close to free diagnostic information, and most people already have it without realising. If you know roughly when the sign first appeared and what the weather or the household was doing, you have already narrowed the field considerably.
| When it appears | Points at | Confirming question |
|---|---|---|
| Within hours of heavy rain, especially wind-driven from one direction | The building envelope: roof covering, flashing, a valley, a penetration or the eaves | Does it appear in settled wet weather too, or only when the wind is up? |
| Shortly after someone showers or runs a bath | Plumbing above, a failed seal, or an extract fan discharging into the void | Does it still happen if nobody uses that bathroom for several days? |
| Through the cooling season, with the system running | HVAC condensate: a blocked drain line, a full pan, or condensation on uninsulated ductwork | Does it stop when the cooling is switched off for a few days? |
| During or just after a cold snap | An ice dam at the eaves, or a frozen supply line in an unheated space | Is there ice visible at the gutter line? A frozen line that has split usually shows up on thaw, covered on our burst pipe repair page. |
| Steadily, with no relationship to weather or use at all | A continuous supply-side leak in the void | Close every fixture and watch the water meter. Movement means active flow. |
| Only in winter, with no rain correlation | Condensation in the void rather than a leak, often from poor ventilation or a fan terminating internally | Is the loft badly ventilated, and does any extract fan discharge into it? |
Homeowner tools versus professional tools
There is a genuine gap between what someone can reasonably do themselves and what an inspection brings, and it is worth being honest about which side of it each tool sits on.
| Tool | Who realistically uses it | What it actually tells you | Limits |
|---|---|---|---|
| A bright torch held at a low angle | Anyone, free | Surface texture, sheen change, early haloes, fixing pops and hairline cracks | Surface only. Tells you nothing about what is above the board. |
| A pencil mark and a date | Anyone, free | Whether the affected area is growing, which separates active from historic | Needs patience. One observation is not data. |
| The water meter | Anyone, free | Whether there is continuous flow in the supply system with everything closed | Only detects supply-side leaks. Silent on roof, waste and condensate problems. |
| A consumer pin-type moisture meter | Homeowner, modest cost | Relative moisture content at the surface, useful for comparing a suspect spot against a known dry one | Leaves pin holes, reads only near the surface, and the absolute numbers are not meaningful without a baseline. |
| A professional pinless meter | Inspector or contractor | Moisture through the depth of the material without damaging the surface, mapped across an area | Reads differently on different materials and needs interpretation against unaffected reference readings. |
| Thermal imaging camera | Inspector or contractor | Surface temperature differences that indicate where to take moisture readings | Shows temperature, not water. See the next section. |
| Borescope or inspection camera | Inspector or contractor | Direct visual confirmation inside the void through a small hole | Requires making an opening, and shows only what is in front of the lens. |
| Hygrometer and psychrometric readings | Contractor during drying | Whether the air in the space can actually take up more moisture, which governs drying progress | A process-control tool rather than a detection tool. |
What thermal imaging does and does not show
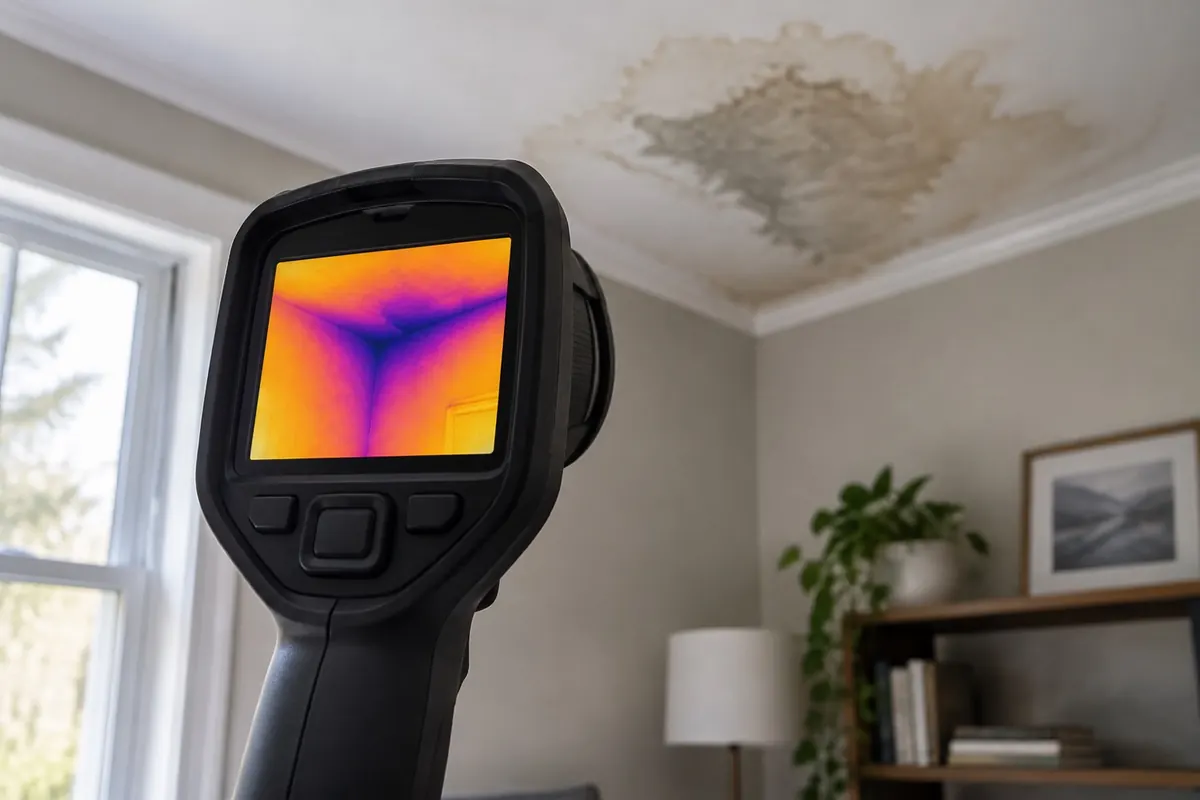
This deserves to be stated plainly because it is routinely misrepresented, including by people selling inspections. A thermal camera measures infrared radiation from a surface and renders it as apparent temperature. It does not detect water. It cannot detect water. What it detects is a surface that is at a different temperature from the surface around it.
Wet material frequently is cooler, because evaporation removes heat from the surface, and because water changes the thermal mass of an assembly so it responds more slowly to temperature swings. That correlation is real and it is useful. But plenty of other things produce a cool patch: a gap in the insulation above, a joist or a steel behind the board, a duct running through the void, an air leak from a loft, or simply a part of the ceiling that has not yet caught up with a change in room temperature.
The correct use is as a survey instrument that tells an inspector where to put a moisture meter. A thermal image on its own, with no corresponding moisture readings and no reference reading on unaffected material, is a picture of a temperature difference. Our water damage inspection page sets out what a defensible assessment should actually document.
Three questions to ask about a thermal image
- Where are the corresponding moisture readings? Every cool area flagged on an image should have a meter reading attached to it.
- What is the reference? Readings on comparable unaffected material in the same room, on the same material, are what make the affected readings mean anything.
- What else could be cool there? A competent report considers and excludes insulation gaps, framing and services before concluding moisture.
A ten-minute routine worth repeating
None of this requires expertise. It requires doing a short, consistent check a few times a year, and at the two moments when it yields most: after the first serious storm of the season, and at the start of the cooling season.
| Step | What to do | Time |
|---|---|---|
| 1 | Turn off the lights in each room below a bathroom, kitchen or roof and sweep the ceiling with a torch held almost flat | About a minute per room |
| 2 | Look specifically at the junction where ceiling meets exterior wall, and directly under any roof penetration | A minute |
| 3 | Look up at each ceiling light fitting and smoke alarm for staining or corrosion | A minute |
| 4 | Stand still in each room and notice the smell, particularly first thing in the morning before windows are opened | A minute |
| 5 | Open the loft hatch, torch across the insulation surface looking for darkened or compressed areas, and check under every roof penetration from inside | Three or four minutes |
| 6 | Check the HVAC condensate pan and drain line if the plant is in the loft or an upper cupboard | A minute |
| 7 | Close every fixture and check whether the water meter is moving | Two minutes |
The loft check is the one that pays
Steps one to four look at the underside of the ceiling, which is the last surface to show anything. Step five looks at the top, which is the first. Darkened insulation, a compressed or slumped patch, daylight visible at a penetration, or staining on the underside of the roof deck are all visible up there weeks or months before anything appears in the room below.
What to do once you have found something
Finding an early sign is the useful part. What follows is short, and the order matters as much here as it does in an emergency.
- Mark and date it. Before anything else, so you can tell later whether it is active.
- Photograph it under raking light. A phone camera with a torch held flat captures what your eye is seeing. This is the beginning of a dated record if it turns into a claim.
- Work out what is above it. The single most informative free step, and the starting point for diagnosis on our water damage ceiling page.
- Run one elimination test. Stop using the fixture above, or wait out a rain event, and see whether the mark moves.
- Check the meter. Every fixture closed. Movement means a supply-side leak and changes the priority completely.
- Get a moisture reading before you decorate. Not after. A ceiling that looks dry and reads wet is exactly the case this page exists to catch.
If any of it involves a ceiling that is sagging or bulging, or water visible inside a light fitting, stop treating it as an early sign. That is a different situation with different priorities, covered under the urgency section of our water damage ceiling page.
Questions people actually ask
What are the earliest signs of water damage on a ceiling?
A faint ring or halo visible only when a torch is held flat against the surface, and a subtle change in sheen or texture. Both appear before any colour is readable under normal room lighting. After those come hairline cracks radiating from one point, nail or screw pops, paint that feels cool or slightly soft, a musty odour with nothing visible, and finally light fittings that flicker or corrode.
How do I check a ceiling for water damage myself?
Turn the room lights off and hold a bright torch flat against the ceiling so the beam runs along the surface, then sweep slowly. That raking light reveals sheen and texture differences that are invisible under a ceiling fitting. Then check the loft from above, look at each light fitting, and check the water meter with every fixture closed.
Does a musty smell always mean water damage?
No, but with nothing visible to explain it, a musty odour that is strongest near the ceiling and worse in still air is worth investigating. Air moves from a ceiling void into the room through downlight cut-outs and loft hatches, so odour escapes long before water works through to the painted face.
Can a thermal camera find a ceiling leak?
It can find where to look, not what is there. Thermal imaging measures surface temperature, not moisture. Wet material is often cooler because evaporation removes heat, but so is an insulation gap, a joist, or a duct in the void. A cool patch should always be followed by a moisture reading and compared against a reference reading on unaffected material.
Are hairline cracks in a ceiling a sign of water damage?
Sometimes. The geometry is the clue: moisture cracks tend to radiate outward from a single origin and come with fixing pops or a sheen change nearby, while ordinary settlement cracks tend to run along board joints or from the corner of an opening. Progression settles it, so mark and date them and check again in a few weeks.
How often should I check?
A ten-minute pass a few times a year is enough for most homes, with the two highest-yield moments being after the first serious storm of the season and at the start of the cooling season when condensate lines start running. Add a check after any work that disturbed the roof or the plumbing.
I found an early sign. What does fixing it cost?
That depends on what caused it and how much material is affected, which is a separate question from detection. Our water damage ceiling page sets out the repair bands, and our water damage restoration cost page covers the drying and mitigation side.
Sources
- Institute of Inspection, Cleaning and Restoration Certification, ANSI/IICRC S500 Standard for Professional Water Damage Restoration, 5th edition, 2021. General structure of moisture assessment, reference readings on unaffected material, and documentation. The standard text is sold by IICRC; we describe its framework rather than reproduce it.
- Progression of visible signs, crack geometry, instrument limits and seasonal patterns are compiled from published restoration practice, building inspection guidance and instrument manufacturer documentation current in 2026.
- Repair scopes referenced in the detection-stage comparison are carried through from our water damage ceiling page, which sets out the cost bands and how they were compiled. This page deliberately does not restate them.
- Our methodology sets out the standing rules on what we publish as compiled guidance versus measured data.