The short answer
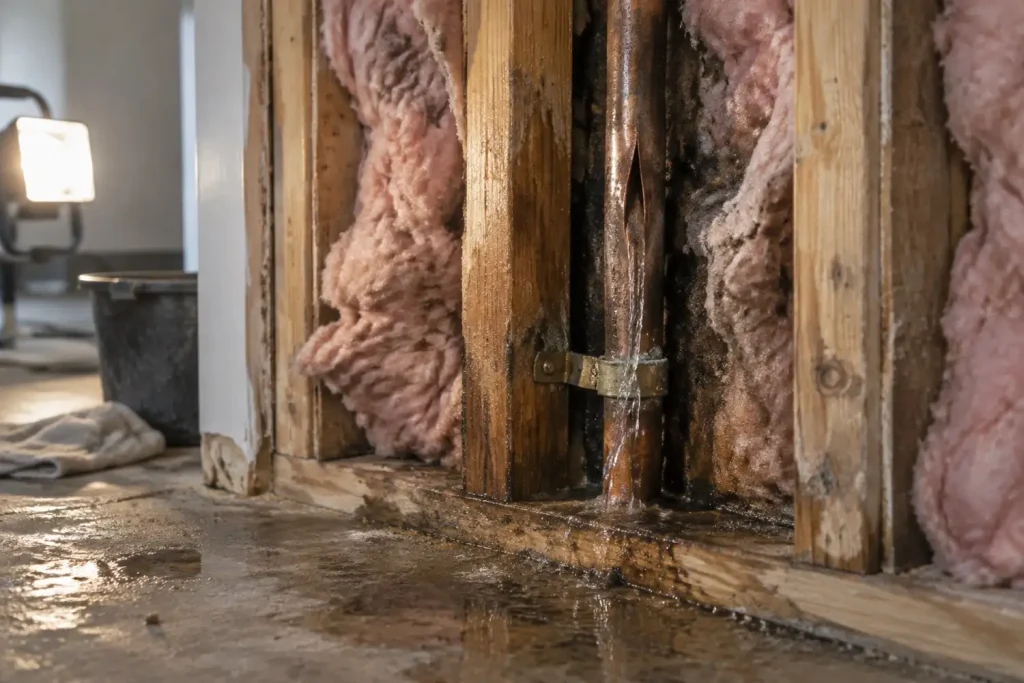
Burst pipe repair is two bills, not one. The plumbing repair itself typically runs $200 to $1,500 depending on access, pipe material and whether a wall or ceiling has to be opened. The water damage mitigation that follows runs about $3.00 to $4.25 per square foot on clean water, and on most losses it is the larger of the two numbers. Response time is a cost variable, because clean water does not stay clean.
Key takeaways
- Price the loss as two scopes. The plumber restores the pipe; a mitigation contractor dries the building. They are separate trades, separate invoices and usually separate coverage treatment.
- Insurance generally pays for the resulting damage and generally does not pay for the failed pipe. That distinction catches people out more than any other single point on this subject.
- Shut off the water, kill power to affected circuits if water is near outlets or fixtures, photograph everything before you move it, then call mitigation. In that order.
- Pipe material predicts the failure mode. Copper splits along a seam, PEX fittings let go before the tube does, ageing CPVC goes brittle, and galvanised steel fails at the threads.
- A supply-line burst is Category 1 clean water on day one. Standing beyond roughly 72 hours, or travelling through contaminated materials, moves it up the scale (ANSI/IICRC S500).
On this page
- The repair and the damage are two bills
- What the plumbing repair costs
- What the water damage costs
- Combined scenario totals
- The first hour, in order
- Why photographs come before cleanup
- Pipe material changes the failure mode
- Bursts inside walls and ceilings
- Why the clock is a cost variable
- What insurance pays for, and what it does not
- Frozen pipes, and why the burst shows up on thaw
- What actually reduces the next one
- Reading the two estimates you will be given
- Questions people actually ask
Search results on this subject are written almost entirely by plumbing companies, which is why they price a plumbing job. That is an honest answer to half the question. The half that gets skipped is the part that usually costs more: the water that left the pipe, where it went, what it soaked, and what has to happen to the building before anyone puts drywall back.
The repair and the damage are two bills
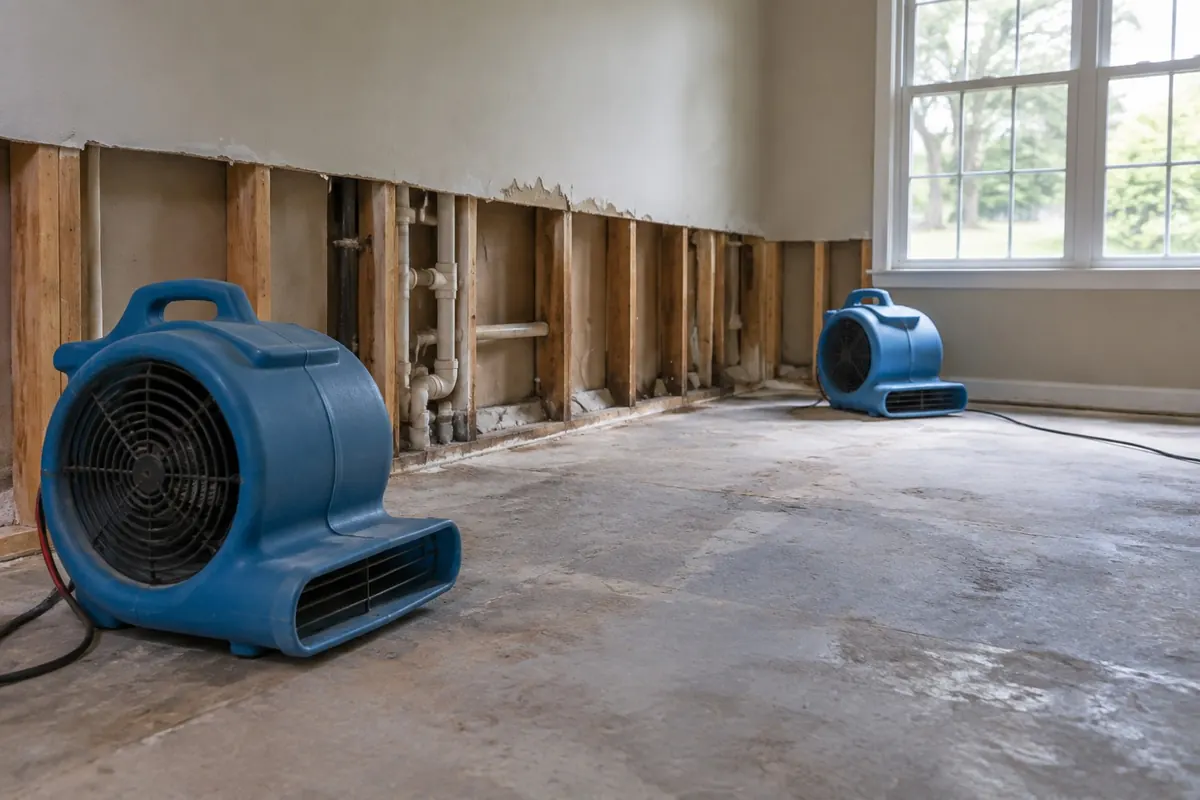
A burst pipe generates two scopes of work that almost never sit on the same invoice. The first is the plumbing repair: isolate, cut out the failed section, fit new pipe, pressure test, restore service. The second is mitigation: extract standing water, remove materials that cannot be dried, set drying equipment, monitor moisture daily until the assembly meets a dry standard.
These are different trades with different licensing, different insurance treatment and different clocks. The plumber can often finish in an afternoon. The building takes days. Reading the two as one number is where most of the shock comes from.
| Scope | Who does it | Typical timing | Typical insurance treatment |
|---|---|---|---|
| Plumbing repair | Licensed plumber | Same day to two days, faster if the pipe is accessible | Often excluded: the policy pays for damage caused, not the component that failed |
| Water mitigation | Restoration contractor | Three to five days of drying on a contained clean-water loss | Generally covered where the discharge was sudden and accidental |
| Reconstruction | General contractor or the restoration firm’s rebuild division | Starts only after drying is verified | Generally covered on the same basis as mitigation |
What the plumbing repair costs
The plumbing half is the predictable half. Three things move it: how hard the pipe is to reach, what the pipe is made of, and whether anyone has to open a finished surface to get at it.
| Repair situation | Indicative plumbing cost | Why it sits there |
|---|---|---|
| Exposed pipe in a basement, crawl space or utility room | $200 to $600 | No demolition. Cut, fit, test. Often a single visit inside an hour or two. |
| Pipe behind drywall, single access point | $450 to $1,000 | Cutting in, working in a cavity, and an open hole left for the drying contractor. |
| Pipe in a ceiling below a bathroom or upper floor | $600 to $1,500 | Overhead work, harder isolation, and frequently a longer run replaced rather than a single joint. |
| Under-slab supply line | $1,500 to $5,000+ | Concrete breaking and reinstatement, or a re-route that abandons the slab run entirely. |
| Whole-section repipe after repeated failures | $2,500 to $15,000+ | Priced as a system replacement rather than a repair. Common where polybutylene or ageing galvanised steel is still in service. |
The call-out premium is real and it is worth paying
Out-of-hours response carries a premium, often a flat emergency fee on top of the repair. Weighed against the mitigation side, it is almost always the cheaper decision. Water continues to leave an unisolated pipe at roughly the same rate all night, and the drying scope grows with the wetted area, not with the size of the hole in the pipe.
What the water damage costs
Mitigation on a clean-water supply-line burst runs about $3.00 to $4.25 per square foot of affected area, and contaminated water runs $7.00 to $12.00. Those are the same bands set out on our water damage restoration cost page, keyed to the water categories defined in ANSI/IICRC S500. The variable most people underestimate is the affected area, because water travels along the path of least resistance and not in a neat circle around the pipe.
| Cost driver | What it does to the number | What controls it |
|---|---|---|
| Affected square footage | Sets the base scope directly | How long the water ran, and whether it found a stairwell, a duct chase or a joist bay to travel along. |
| Water category | Roughly doubles the per-foot rate between Category 1 and Category 3 | Elapsed time and what the water passed through on its way. |
| Drying duration | Equipment bills per unit per day, so days are money | Materials wetted. Hardwood, plaster and concrete hold water far longer than painted drywall. |
| Materials that cannot be dried in place | Adds a demolition and disposal scope | Carpet pad, insulation, particleboard and saturated unsealed drywall. |
| Contents | Usually a separate line, often a separate claim heading | Whether soft goods, stored boxes or cabinetry were in the affected footprint. |
Combined scenario totals
Per-foot rates are useful for comparing bids and useless for budgeting, because nobody knows their affected footage before an inspection. These are whole-job ranges covering both halves: the plumbing repair and the mitigation that follows it.
The pattern in those bars is the whole argument of this page. The plumbing component barely moves across the range. What moves is how long the water ran and what it reached. A line that fails under a sink in front of someone is cheap. The identical line failing inside a wall on a Friday night is not.
Where the money actually goes
The proportions shift with the specifics, and on a slab repair the plumbing share climbs sharply. But the shape holds: the failed component is a minority of the spend on most residential losses.
The first hour, in order
The sequence below is not arbitrary. Each step protects the one after it, and doing them out of order costs money later.
| Step | What to do | Why it is in this position |
|---|---|---|
| 1. Shut off the water | Close the main stop. If a local isolation valve serves the failed line and you can reach it safely, that works too. | Everything else is pointless while water is still arriving. Find and label the main before you ever need it. |
| 2. Kill power to affected circuits | If water is near outlets, fixtures, a consumer unit or an appliance, switch off those circuits at the board. | Practical safety. Do not wade into standing water to reach a breaker panel; if the panel is in the water, call the utility or an electrician. |
| 3. Photograph and film before moving anything | Wide shots of each room, then close-ups of the failure point, wet materials, and affected contents. Include a timestamp source. | This is the evidence base for the claim, and it exists only in this window. |
| 4. Call mitigation | A restoration contractor, before or alongside the plumber. | Drying starts the clock in your favour. Category degrades with elapsed time, not with effort. |
| 5. Notify the insurer | Report the loss and note the time you discovered it. | Most policies require prompt notice and reasonable steps to prevent further damage. |
| 6. Move what you can, safely | Lift contents off wet flooring, get soft goods out of the footprint. | Reduces the contents scope, but only after step 3 has recorded where everything was. |
Why photographs come before cleanup
This is the step people skip, and it is the one that is genuinely irreversible. Once water is extracted and wet carpet is lifted, the condition that the claim describes no longer exists anywhere except in whatever was recorded at the time.
An adjuster arriving three days into a dry-out sees drying equipment and open cavities. They do not see how far the water reached, how deep it stood, or which contents were sitting in it. The mitigation contractor’s own documentation covers the scope they performed, which is a different question from what was damaged before they arrived.
What to capture, specifically
- The failure point itself. The split, the fitting, the corroded section. If the plumber removes the failed piece, ask to keep it and photograph it separately.
- Water lines on walls and furniture. A visible high water mark is direct evidence of depth and is gone once things dry.
- Each affected room, wide then close. Wide shots establish extent; close-ups establish condition.
- Contents in position. Photograph items where they sat before moving them, not afterwards on a driveway.
- Video with narration. A slow walk-through describing what is being shown captures context that stills miss.
- Meter readings if anyone takes them. If the mitigation crew takes moisture readings on arrival, ask for a copy of the initial set.
Do not delay mitigation waiting for an adjuster to attend. Most policies require you to take reasonable steps to prevent further damage, and several days of standing water can move a Category 1 loss up the scale. Photograph thoroughly, then let drying start. Our water damage inspection page covers what a proper initial assessment should record.
Pipe material changes the failure mode
What the pipe is made of predicts how it fails, where it fails, and how much warning you get. It also tells you whether the failure is likely to be a one-off or the first of a series.
| Material | Typical failure mode | Where it shows up | What it implies |
|---|---|---|---|
| Copper | Splits along a longitudinal seam when water inside freezes and expands; also pinholes from internal corrosion | A clean lengthwise split, often several centimetres long | A freeze split is usually an isolated event tied to one cold exposure. Repeated pinholing points at water chemistry and suggests a systemic problem. |
| PEX | The tube itself tolerates freezing better than copper because it can expand; fittings and crimp connections are the weak point | At a connection, a manifold or a transition to another material | More forgiving in a cold snap, but a fitting failure can sit hidden inside a wall or under a floor for a long time. |
| CPVC | Becomes brittle with age and UV exposure, then cracks at a joint or under mechanical stress | At solvent-welded joints, or where a run is clipped too tightly | Brittleness is age-related and system-wide. One failure in an old CPVC system often precedes others. |
| Galvanised steel | Corrodes from the inside out, thinning the wall and failing at threaded connections where the wall is already reduced | At threads, unions and elbows, usually with rust staining first | Effectively end-of-life plumbing. Repair buys time; repiping is the actual fix. |
| Polybutylene | Degrades from contact with treated water and fails at fittings or along the tube | Grey or blue tube, commonly installed in late-century housing | Widely treated as a replacement item rather than a repair item by both plumbers and insurers. |
Why the material matters to the water damage side
A copper freeze split releases a lot of water quickly, which means it is usually noticed fast and the damage is concentrated. A PEX fitting weeping inside a wall releases very little water very slowly, which means nobody notices for weeks and the damage is dispersed through insulation, framing and sheathing. The second one often costs more despite losing far less water.
Bursts inside walls and ceilings
A pipe that fails in an open basement announces itself. A pipe that fails inside a wall cavity, above a ceiling or under a floor can run for days or weeks before anything visible appears, and that interval is where the cost is decided.
| Early sign | What it usually means | What to check |
|---|---|---|
| Water bill rises with no change in use | Continuous flow somewhere in the system | Turn off every fixture and watch the meter. Movement means an active leak. |
| A section of wall or floor feels cool or damp | Moisture in the assembly behind the surface | Compare against an identical unaffected area. A moisture meter settles it properly. |
| Musty odour with nothing visible | Sustained wetting in a cavity, often already growing mould | Trace the odour to its strongest point and look above and behind it. |
| Paint bubbling, tape seams lifting, or a soft patch | Drywall has taken on water and lost strength | Do not paint over it. The source is still running. |
| Warm patch on a floor over a slab | A hot water supply line leaking under the slab | A plumber can isolate the hot side and watch the meter to confirm. |
| Sound of running water with nothing on | Active flow inside the structure | Isolate at the main and listen again. |
The reason this matters for coverage as well as cost is that many policies treat sudden and accidental discharge differently from damage that developed gradually. A concealed leak that ran for weeks can attract an argument about which of those it was. Our coverage guide sets out how that distinction usually works.
Why the clock is a cost variable
ANSI/IICRC S500 classifies water losses by how contaminated the water is, and the classification is not fixed at the moment of failure. A supply line carries potable water, so a burst is Category 1 clean water on day one. It does not stay that way.
| Category | What it describes | Typical burst-pipe route into it |
|---|---|---|
| Category 1, clean | Water from a sanitary source with no substantial contaminants | Any supply-line burst, on the day it happens. |
| Category 2, grey | Water carrying significant contamination capable of causing discomfort or illness | Clean water that has sat, or that has passed through building materials carrying contaminants. |
| Category 3, black | Grossly contaminated water | Water standing beyond roughly 72 hours, water that contacted sewage, or water arriving from outside the building. |
The commercial consequence is blunt. Category is roughly the difference between $3.00 to $4.25 per square foot and $7.00 to $12.00 per square foot on the mitigation scope, using the bands on our cost page. Response time is not a convenience. It is the single lever a property owner controls that moves the bill by that much.
Warm buildings degrade water faster than cold ones
Temperature drives microbial growth, so the same elapsed time does different things in a heated house and an unheated one. A burst in a warm occupied building degrades faster than the same burst in a cold vacant one. That is one reason a loss discovered on return from holiday behaves differently depending on whether the heating was left running.
What insurance pays for, and what it does not
This is the point that surprises almost everyone, and it is worth stating plainly: on most standard homeowners policies, the water damage is covered and the pipe is not.
The logic is that property insurance covers sudden and accidental damage to the property, not the failure of a component. The pipe is the component that failed. The soaked ceiling, ruined flooring and drying costs are the resulting damage. The first is treated as maintenance and the second as a covered loss.
The access exception is worth knowing about
Many policies will pay to tear out and replace the wall, ceiling or floor needed to get at the failed pipe, even while declining to pay for the pipe itself. That can be the larger figure on an in-wall or under-slab repair, so it is worth asking the question specifically rather than assuming the whole repair line is excluded.
Where claims actually get argued
- Sudden versus gradual. A pipe that split is clearly sudden. A fitting that wept for four months into a cavity is the fight.
- Freeze exclusions on unoccupied property. Several standard forms limit or exclude freeze damage where a property was left unoccupied without heat maintained or the system drained. If a property will sit empty in winter, this clause is worth reading before it matters.
- Scope of drying. How many pieces of equipment, for how many days. Daily moisture logs are what settle this.
- Matching. Whether undamaged flooring or tile has to be replaced to match a repaired section, which varies by state and by policy.
Frozen pipes, and why the burst shows up on thaw
Freezing does not usually rupture the pipe at the ice. Water expands as it freezes, and the ice plug pushes water ahead of it toward a closed tap or valve. Pressure builds in that trapped section, and the pipe fails at the weakest point in the run, which is frequently some distance from the frozen part.
The split can then sit there doing nothing at all, because the ice is still blocking flow. Water only arrives when the line thaws. That is why so many frozen-pipe losses are discovered during a warm spell after a cold snap, or on the afternoon someone gets the heating back on, rather than during the freeze itself.
| Location | Why it freezes | What tends to happen |
|---|---|---|
| Unheated exterior wall cavity | Pipe sits outboard of the insulation with cold sheathing behind it | A concealed split that discharges into the wall on thaw and can run for hours unnoticed. |
| Crawl space | Open vents, little or no insulation, cold air moving underneath the floor | Water discharges into the crawl space, soaks insulation and subfloor from below, and is often found late. |
| Attic and upper-floor ceilings | Lines run above the insulation line where attic temperature tracks outside air | The worst case. Water travels down through ceilings and walls and affects two or more floors. |
| Unheated garage | Often on an exterior wall and routinely left below freezing | Usually discovered quickly because the space is visible and unfinished. |
| Outdoor tap and hose bib | Exposed directly, and a connected hose stops the line draining | The split is frequently inside the wall behind the tap rather than at the visible fitting. |
Thawing without making it worse
If a line is frozen and has not yet burst, open the tap it serves so melting water has somewhere to go, and apply gentle warmth working back from the tap toward the frozen section. Never use an open flame. And before any of it, know where your main stop is and check it turns, because if that pipe has already split you have seconds rather than minutes once flow resumes.
What actually reduces the next one
Prevention advice on this subject is usually a list of twenty things. Realistically, a short list does most of the work.
| Measure | What it addresses | Practical note |
|---|---|---|
| Know and label the main shut-off | Minutes of uncontrolled discharge | The single highest-value item on this list and it costs nothing. Test that the valve actually turns. |
| Automatic leak-detection shut-off | Failures that happen while nobody is home | A whole-house valve that closes on an abnormal flow pattern. Some insurers offer a premium credit for one. |
| Insulate pipes in unheated spaces | Freeze risk in attics, crawl spaces and garages | Insulation slows heat loss, it does not add heat. A pipe in a genuinely unheated space can still freeze in a long cold snap. |
| Disconnect hoses and isolate outdoor taps | The most common single freeze failure point | A connected hose keeps water sitting in the line where it cannot drain. |
| Replace braided supply hoses on a schedule | Washing machine, dishwasher and toilet connectors | Cheap, easy to reach, and a frequent cause of unattended losses. |
| Maintain heat in vacant property | Freeze damage during absences, and the exclusion that often follows it | Either keep the heating on or drain the system down. Check what your policy actually requires. |
Reading the two estimates you will be given
You will end up holding a plumbing invoice and a mitigation estimate, and they answer different questions. A handful of questions separates a defensible pair from a vague one.
- Is the plumbing repair a repair or a section replacement? On ageing galvanised steel or CPVC the distinction matters, because a spot repair may be the first of several.
- What category and class is the mitigation priced for? If the estimate does not say, ask. It sets everything else.
- How many pieces of equipment, for how many days? The count should follow from the class of the loss and the days should follow from moisture readings, not from a fixed assumption.
- Where are the moisture readings? A baseline on unaffected material, daily monitoring, and a final reading that meets the dry standard. Without those there is no evidence the job finished.
- Is reconstruction included or separate? Mitigation and rebuild differ by roughly five times per square foot, so merging them makes two quotes impossible to compare.
- Who is handling the claim paperwork? Establish whether the contractor bills the carrier directly and what you are signing if they do.
One practical warning. Be careful about signing a broad assignment of benefits before you understand it, because it can transfer your rights under the claim to the contractor. Read what you sign at the kerbside at two in the morning, or ask for time to read it.
Questions people actually ask
How much does burst pipe repair cost?
The plumbing repair typically runs $200 to $600 for an exposed pipe, $450 to $1,000 behind drywall, $600 to $1,500 in a ceiling, and $1,500 to $5,000 or more under a slab. The water damage mitigation that follows is a separate bill and on most losses it is the larger one. Figures are indicative ranges compiled from published contractor price guides current in 2026.
Does homeowners insurance cover a burst pipe?
Generally the resulting water damage is covered where the discharge was sudden and accidental, while the failed pipe section itself is often not, because it is treated as the component that failed rather than damage caused. Many policies will pay to open and reinstate the wall or floor needed to reach it. Coverage depends on your specific policy wording.
What should I do first when a pipe bursts?
Shut the water off at the main. Then kill power to affected circuits if water is near outlets, fixtures or a panel. Then photograph and film everything before moving anything. Then call a mitigation contractor and notify your insurer. The photographs step is the one people skip and it is the only one that cannot be repeated later.
How long does it take to dry out after a burst pipe?
Typically three to five days of equipment on a contained clean-water loss, and longer where hardwood, plaster or concrete took on water. Drying is finished when moisture content in the affected material meets a dry standard measured against comparable unaffected material, not when a set number of days has elapsed.
Why did my pipe burst somewhere other than where it froze?
Because the ice plug pushes water ahead of it toward a closed tap, and the resulting pressure fails the pipe at the weakest point in that trapped section. That point is often well away from the frozen part, which is also why the leak usually only appears once the line thaws and flow resumes.
Can I just dry it myself with fans?
For a small clean spill on non-porous flooring, caught in minutes, sometimes. The risk is water inside wall cavities, under flooring and in insulation that household fans cannot reach, which then becomes a mould problem at several times the cost of the drying you avoided.
Is it worth calling an emergency plumber at night?
Usually yes. The out-of-hours premium is a fixed amount, while the mitigation scope keeps growing for as long as water is arriving and sitting. Water standing beyond roughly 72 hours is commonly treated as Category 3 under ANSI/IICRC S500, which roughly doubles the per-square-foot mitigation rate.
Sources
- Institute of Inspection, Cleaning and Restoration Certification, ANSI/IICRC S500 Standard for Professional Water Damage Restoration, 5th edition, 2021. Water category definitions and the degradation of category over elapsed time. The standard text is sold by IICRC; we describe its framework rather than reproduce it.
- Plumbing repair ranges, pipe material failure modes and freeze behaviour are compiled from published plumbing contractor and aggregator price guides and building science guidance current in 2026. They are indicative rather than survey results.
- Mitigation per-square-foot bands are carried through from our water damage restoration cost page, which sets out how those ranges were compiled.
- Coverage descriptions reflect general patterns in standard United States homeowners policy forms. They are not coverage advice and every policy differs. See our coverage guide.
- Our methodology sets out the standing rules on what we publish as compiled ranges versus measured data.