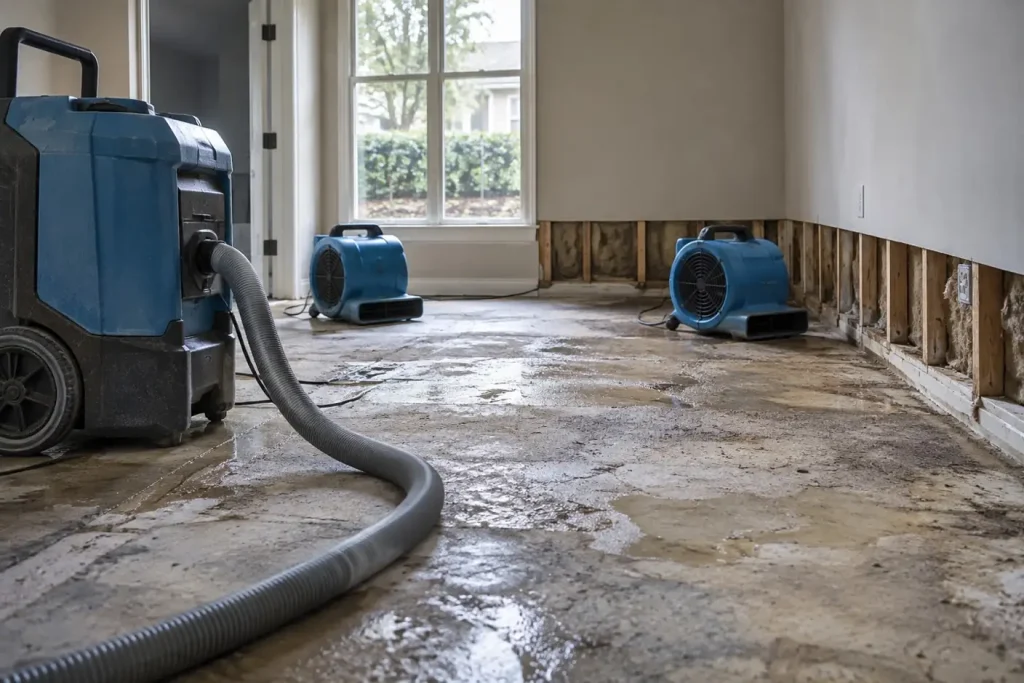
The short answer
Water damage clean up runs in a fixed order: stop the source, make the area electrically safe, document everything before anything moves, extract standing water, remove the porous materials that cannot be dried, set air movers and dehumidifiers, then monitor moisture daily until readings match unaffected material. Drying finishes when the readings say so, not on a set day.
Key takeaways
- Documentation comes before cleanup. Cleaning first destroys the evidence the claim is built on, and it cannot be recreated.
- The first hour is about stopping water and making the area safe, not about drying. Extraction starts once the photographs exist.
- The 24 to 48 hour window is where clean water degrades into a contaminated loss, which changes what can be saved rather than just how long it takes.
- Some materials come out and some get dried in place. Carpet underlay goes, insulation goes, tile and concrete stay. That split is decided early and it drives everything after.
- Household fans move air without removing humidity. That is the real boundary between a job you can do and one you cannot.
- Completion is a measurement against unaffected material, not a fixed number of days. Equipment pulled early is the most expensive saving available.
On this page
- The first hour
- Why documentation comes before cleanup
- The 24 to 48 hour window
- The first 24 hours of work
- What comes out and what gets dried
- Contents triage happens in parallel
- Why you need both air movers and dehumidifiers
- Days two to five
- How anyone knows it is finished
- Where the DIY boundary honestly sits
- The mistakes that turn a small job into a large one
- The whole timeline on one page
- Questions people actually ask
Water damage clean up is a sequence, and almost every expensive outcome traces back to running the steps in the wrong order. This page sets out what happens hour by hour and day by day, what gets removed and what gets dried, and where the line sits between something you can handle and something you cannot. It deliberately does not price the work. Our water damage restoration cost guide covers pricing in detail, including why the water category moves the number more than the floor area does.
The first hour
Nothing dries in the first hour and it is not meant to. The first hour is about stopping the water, making the space safe to work in, and creating the record that everything afterwards depends on. Four actions, in this order.
| Order | Action | Why it comes here |
|---|---|---|
| 1 | Stop the source | Close the isolation valve for the appliance or fixture, or the main stop if you cannot find it. Nothing else matters while water is still arriving. |
| 2 | Kill power to the affected circuits | If water is near outlets, extension leads or appliances, the circuit comes off at the consumer unit before anyone enters the water. If the consumer unit itself is wet, do not touch it. |
| 3 | Photograph and video before anything moves | Wide shots of each room, then close shots of each affected item and the water line against a fixed reference. This is the evidence base and it cannot be recreated. |
| 4 | Notify the insurer and, if renting, the landlord | Two notifications if you rent. Starting the file early is free and delay is not. |
| 5 | Begin extraction | Only now. Standing water removal is the first step that actually reduces the damage, and it comes after the record exists. |
Electrical safety is the one step with no exceptions
Water in contact with outlets, plugged-in appliances or a wet consumer unit is a serious hazard, and it is the reason professional responders assess power before they assess moisture. If the water is deep enough to reach socket height, or if the consumer unit itself is affected, the answer is to leave the area and have the supply isolated by someone qualified. Ready.gov flood safety guidance sets out the general safety position on entering flooded spaces.
Stopping the source is not the same as fixing it
Closing a valve stops the water. It does not repair the failed pipe, the split hose or the cracked tank, and that repair is a separate trade from the drying work. Restoration contractors dry buildings; plumbers fix plumbing. Expecting one invoice to contain both is a common source of confusion, and our cost guide covers what does and does not sit inside a mitigation scope.
Why documentation comes before cleanup
This is the step most often skipped and the one with the most expensive consequences. Every water damage claim is decided on evidence of what the condition was when the loss was discovered. Once the water is extracted, the carpet is lifted and the ruined furniture is on the drive, that condition no longer exists anywhere except in whatever record you made.
The adjuster is not being obstructive when they ask for this. They are being asked, by their own file, to establish the extent of the damage and the cause of the loss. A claim supported by timestamped photographs of the water line, the affected rooms and each damaged item is a straightforward scope discussion. A claim supported by a clean, dry room and a verbal description is a negotiation.
| What to capture | How | What it proves |
|---|---|---|
| Wide shot of each affected room | From the doorway, then from the opposite corner | The extent of the affected area, which drives the entire scope. |
| The water line against a fixed reference | Photograph the tide mark next to a door frame, socket or skirting board | Depth, which determines what was submerged and how far up the wall material was affected. |
| Each damaged item, individually | Close shot including any model plate or serial number | Turns a disputed category into a specific item with a replacement price. |
| The source of the water | The failed component itself, before it is replaced | Cause of loss, which is what coverage turns on. |
| Video walkthrough with narration | Walk the space slowly, say what things are and what is wet | Context that still photographs miss, and it takes two minutes. |
| Moisture readings, once taken | Photograph the meter display against the surface being read | The baseline the drying progress is later measured against. |
Photograph, then mitigate, and do not wait for the adjuster
There is a tension here that trips people up. Standard property policies impose a duty to take reasonable steps to prevent further damage, so sitting in a wet house for three days waiting for an adjuster can itself become a coverage argument. The resolution is the order above: document first, which takes fifteen minutes, then begin mitigation immediately. Nobody expects you to preserve a flooded room intact.
The 24 to 48 hour window
The single most useful thing to understand about water damage clean up is that the job changes character with time, and it changes in one direction only. Water is classified by how contaminated it is, and that classification decides whether porous material can be dried where it sits or has to be cut out and disposed of. Clean water left standing does not stay clean water.
| Elapsed time | What is happening | Effect on the job |
|---|---|---|
| 0 to 4 hours | Water is spreading and being absorbed | Best case. Clean water, most materials savable, smallest scope. |
| 4 to 24 hours | Absorption into porous materials, wicking up wall material | Still generally clean, but the affected area is now larger than the visible wet area. |
| 24 to 48 hours | Contamination from building materials and contents, microbial activity beginning in warm conditions | Degradation toward a contaminated loss. Some porous materials stop being savable. |
| 48 to 72 hours | Established microbial growth, odour developing | Materials that would have been dried at hour four are now removal items. |
| Beyond 72 hours | Water standing this long is commonly treated as grossly contaminated regardless of how it started | Full removal of affected porous materials, containment, and a verification step at the end. |
The classification framework is set out in ANSI/IICRC S500, and our water categories reference explains the three categories and what each one means for materials. The practical consequence is commercial as well as technical: a loss reported on a Friday evening and attended on Monday morning is not the same job as the same loss attended within four hours. It has a larger scope, more material in the skip, and a different cost, which the cost guide quantifies.
The first 24 hours of work
Once documentation exists and the area is safe, the first day is about removing water and removing the materials that will not dry. Everything on day one is subtractive. The drying equipment goes in at the end of it, not at the start.
| Step | What happens | Why it is in this position |
|---|---|---|
| Bulk extraction | Standing water removed with extraction equipment, including water pulled from carpet through the surface | Every litre extracted mechanically is a litre that does not have to be evaporated and then condensed out of the air, which is far slower. |
| Inspection and moisture mapping | Meters used to find the actual boundary of the affected area, including inside wall cavities and under flooring | The wet area is almost always larger than the visible area. Setting equipment to the visible boundary leaves water behind. |
| Baseline readings on unaffected material | Readings taken on the same material type in an unaffected part of the building | Drying is finished when affected material matches this. Without a baseline there is no finish line. |
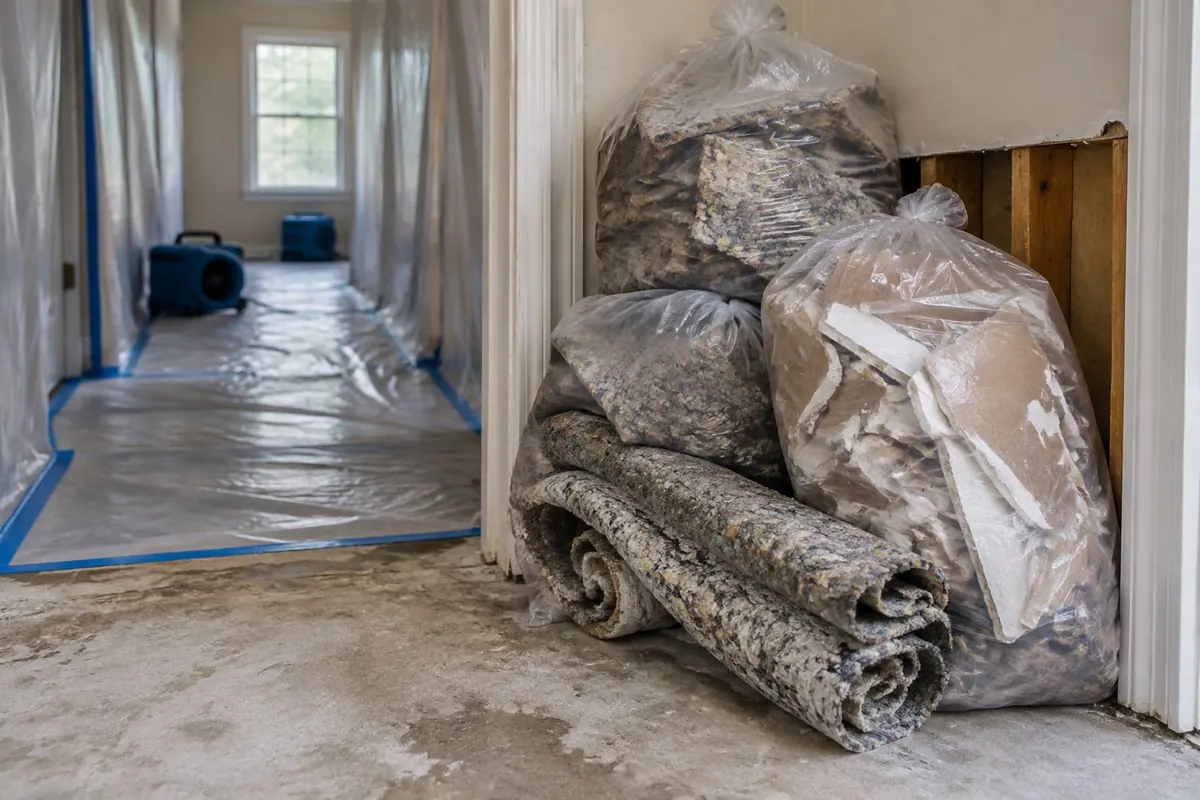
| Selective removal | Porous materials that cannot be dried in place are cut out and bagged | Leaving them in slows the whole dry and, on a contaminated loss, makes it unverifiable. |
| Contents triage | Belongings sorted into savable, needs specialist cleaning, and unsalvageable | Wet contents keep adding moisture to the air, and salvage windows on paper and textiles are short. |
| Equipment set | Air movers and dehumidifiers positioned and switched on | Last, because everything before it reduces the load the equipment has to handle. |
Moisture mapping is why the wet patch is bigger than it looks
Surfaces look dry long before the material behind them is dry. Water travels sideways along the top of a subfloor, wicks upward inside plasterboard, and sits in insulation that shows nothing at all from the room side. The meter survey is what establishes the real boundary, and it is the difference between drying the room and drying the building. Our water damage inspection guide covers how that assessment is done and what the instruments actually measure.
What comes out and what gets dried
This is the table people most want, because it determines how disruptive the job will be. The decision is driven by two things: how porous the material is, and how contaminated the water was.
| Material | Usual decision | Reason |
|---|---|---|
| Carpet underlay | Removed, almost always | An open-cell sponge that holds water against the subfloor. It is cheap to replace and slow to dry, so it goes even on clean water. |
| Carpet itself | Sometimes saved on clean water, removed on contaminated water | Can be floated and dried in place if the water was clean and it is reached quickly. Contaminated water means the backing cannot be verified clean. |
| Plasterboard below the tide line | Usually cut out to a line above the wet boundary | Wicks upward, holds water in the paper facing, and hides wet insulation behind it. |
| Cavity insulation | Removed | Retains water, loses thermal performance when compressed by it, and is invisible from the room. |
| Solid hardwood flooring | Specialty drying attempted where it is caught early | Expensive to replace, so panel or mat systems are used to pull moisture through it. Success depends on how quickly work started. |
| Engineered wood and laminate | Usually removed | Layered construction delaminates and swells, and the core holds water that cannot be reached. |
| Tile, stone and concrete | Dried in place | Non-porous or slow-porous surfaces. Concrete holds moisture for a long time but releases it without removal. |
| Solid timber structure and studs | Dried in place | Structural and expensive to replace. Dried and monitored rather than cut out, unless rot is already established. |
| Cabinetry with a particleboard core | Frequently removed | Particleboard swells irreversibly once it takes water into the core. |
Two specific materials worth flagging
Carpet and hardwood are the two where speed changes the outcome most, which is why they both have their own pages. Our wet carpet guide covers when a carpet can be floated and dried against when the underlay decision makes it academic, and our wet drywall guide covers how the cut line above the tide mark is chosen and why plasterboard behaves the way it does.
Contents triage happens in parallel
The building and the belongings are two separate workstreams running at the same time, and contents are frequently the part that gets left until the structure is sorted. That is the wrong way round for anything paper or textile, where the salvage window is measured in hours.
- Move dry items out of the wet zone first. Anything not yet affected should leave the room before it becomes affected. This is the cheapest mitigation available.
- Lift what can be lifted. Furniture legs on wet carpet wick water upward and can stain the carpet from the finish. Blocks or foil under the legs solve both.
- Sort into three piles, not two. Savable in place, needs specialist cleaning off site, and unsalvageable. The middle pile is the one people forget exists.
- Paper and photographs come first. These have the shortest window of anything in the building and freezing is a legitimate holding step where volume is large.
- Do not throw anything away yet. Photograph everything and keep damaged items until the adjuster has seen them or released them in writing.
- Wet contents are a moisture load. A pile of soaked belongings in the corner is evaporating into the same air the dehumidifier is trying to dry, which slows the whole job.
Why you need both air movers and dehumidifiers
The equipment logic is simple and it is the thing household drying attempts get wrong. Two different jobs are being done, and doing only one of them does not half-dry the building. It moves the water around.
| Equipment | What it does | What happens without it |
|---|---|---|
| Air mover | Moves air across wet surfaces to break the saturated boundary layer and accelerate evaporation | Evaporation slows to a crawl, because the air immediately against the wet surface saturates and stops accepting moisture. |
| Dehumidifier | Removes the evaporated vapour from the air so evaporation can continue | The room humidity rises until evaporation stops, and the moisture redeposits on cooler surfaces elsewhere in the building. |
| Both together | Evaporation is driven and the resulting vapour is removed | This is the only combination that actually dries a structure. |
| Air scrubber with filtration | Removes particulate from the air, used on contaminated losses | Contaminated particulate stays airborne and spreads on the air the movers are pushing. |
| Specialty drying systems | Direct air into wall cavities, under flooring or into subfloor voids | Water in an enclosed void stays there while the room reads dry. |
This is exactly why household fans are not enough
A box fan does one of the two jobs, badly. It increases evaporation from wet surfaces and then leaves the resulting vapour in the house, where it raises humidity throughout and recondenses on any cooler surface it reaches, including inside wall cavities and on the underside of floors. Opening the windows helps only if the outdoor air is drier than the indoor air, which on a rainy day it is not. The equipment that matters is the part that removes water from the air, and almost nobody has one.
Days two to five
The visible work is finished by the end of day one. What follows is the part that decides whether the job succeeded, and it is almost entirely measurement.
| Day | What should be happening | What to expect to see |
|---|---|---|
| Day 2 | First monitoring visit. Readings taken on the same points as the baseline, equipment repositioned if any area is lagging | A recorded set of readings per affected material, and a note of any equipment moved and why. |
| Day 3 | Second monitoring visit. Equipment count may be reduced on areas that have reached target | Readings trending down. Areas at target released from equipment individually rather than all at once. |
| Day 4 | Continued monitoring, with attention to slow materials such as hardwood, plaster and concrete | Slow materials still above target while everything else is done. This is normal. |
| Day 5 onward | Only the slow materials still under equipment | Reduced equipment on a smaller footprint, not the original set running in an empty room. |
| Completion | Final readings on every affected material against the unaffected baseline, then demobilisation | A final reading sheet. This is the document that says the job finished. |
Daily readings are the deliverable, not the equipment
It is worth being blunt about what you are entitled to see. A drying job produces a document: a set of readings per affected material, per day, against a baseline, showing a downward trend to target. Equipment humming in a room is not evidence that drying is happening. If nobody is producing readings, nobody knows, and the job cannot be shown to have finished when the invoice arrives.
How anyone knows it is finished
Drying is complete when the moisture content of the affected material matches that of the same material in an unaffected part of the building, and holds there. Not when five days have passed, not when the surface feels dry, and not when the equipment is needed on another job.
- The comparison is to the building, not to a number. A timber stud in a humid coastal property reads higher when dry than the same stud in a dry climate. The unaffected baseline is what makes the target meaningful.
- Every affected material gets its own target. Plasterboard, timber, concrete and screed all behave differently and reach target at different times.
- Surface dry is not dry. Meters that read the surface of a material will show a plasterboard wall as dry while the core is still wet. This is why penetrating readings exist.
- The final reading sheet is the completion document. It is what tells a future buyer, a future surveyor or a future insurer that the loss was properly resolved.
- Closing up wet is the failure mode. Moisture sealed behind new plasterboard becomes a mould job, and that one is a warranty dispute rather than an insured loss.
Pulling equipment early to save a day or two is the most expensive saving available on a water loss. Moisture left in an assembly and then closed up behind new finishes reappears months later as microbial growth, at which point the scope is larger, the argument about who pays is harder, and the original drying invoice looks cheap by comparison.
Where the DIY boundary honestly sits
Not every water event needs a contractor, and pretending otherwise is not useful. The boundary is not about how much water arrived. It is about where the water went, what it was carrying, and whether household equipment can physically do the job.
| Situation | Reasonable to handle yourself? | Why |
|---|---|---|
| A glass of water or a small spill on tile or vinyl, mopped immediately | Yes | Non-porous surface, no cavity involvement, no time for absorption. |
| A leaking appliance caught within minutes, water confined to hard flooring | Usually | If nothing reached the wall base or an unsealed joint, surface drying is genuinely sufficient. |
| Water that reached carpet | Rarely | The underlay beneath is already saturated and household equipment cannot reach or dry it. |
| Water that reached the base of a wall | No | It is in the cavity, in the insulation and possibly in the subfloor. None of that is reachable without opening the wall. |
| Water under or through a floor covering | No | The subfloor is wet and drying it needs the covering lifted or specialty equipment. |
| Anything larger than roughly one room | No | The evaporation load exceeds what any household equipment can remove from the air. |
| Any grey or contaminated water, regardless of area | No | The question stops being about drying and becomes about removal, containment and verification. |
| Any water of unknown origin standing more than a day | No | Treat as contaminated. It has had time to degrade. |
The honest reason most household attempts fail
It is not effort and it is not diligence. It is that a household has fans and no dehumidification capacity worth the name. A domestic dehumidifier bought for a damp bedroom removes a small fraction of what a commercial unit removes per day, and structural drying is entirely a question of how much water you can take out of the air before evaporation stalls. That is the whole of the difference.
The mistakes that turn a small job into a large one
- Cleaning before documenting. Fifteen minutes of photographs, lost permanently, in exchange for a head start that makes no difference to the outcome.
- Waiting for the adjuster before starting. Your policy almost certainly requires you to prevent further damage, and three days of waiting can move the loss into a different water category entirely.
- Drying only what is visible. The wet area found by a meter is routinely larger than the wet area found by eye, and everything outside the equipment footprint stays wet.
- Leaving the underlay in under a dried carpet. The carpet reads dry from above while the sponge beneath it is saturated against the subfloor.
- Closing up before the final readings. New plasterboard over wet insulation is the single most reliable way to convert a drying job into a mould job.
- Throwing damaged items away before the adjuster sees them. A photographed and retained item is a claim line; a skipped item is an argument.
- Running fans with the windows open on a humid day. Bringing in air wetter than the air inside adds moisture and slows the dry.
- Treating the plumbing repair as part of the drying job. They are separate trades and separate scopes, and assuming one invoice covers both leads to a surprise. The cost guide sets out what a mitigation scope actually contains.
The whole timeline on one page
| Phase | When | What defines it |
|---|---|---|
| Make safe and record | First hour | Source stopped, power isolated where needed, photographs and video taken, insurer notified. |
| Extract and remove | Hours 1 to 24 | Standing water out, moisture mapped, baseline readings taken, unsalvageable porous materials removed, contents triaged. |
| Establish drying | End of day 1 | Air movers and dehumidifiers set to the mapped area rather than the visible area. |
| Monitor and adjust | Days 2 to 5, sometimes longer | Daily readings against baseline, equipment moved or reduced as areas reach target. |
| Verify completion | When readings meet the standard | Final readings on every affected material, matched to unaffected baseline. Demobilisation follows, not precedes. |
| Reconstruction | After verification | A separate scope and frequently a separate contractor. Never started before the readings are met. |
Two pages sit either side of this one. Our water damage inspection guide covers the assessment that establishes the scope, and our restoration cost guide covers what each phase costs and why category and class move the number more than floor area does. Our methodology sets out the standing rules applied to every figure published here.
Questions people actually ask
What should I do first after water damage?
Stop the source, then make the area electrically safe if water is near outlets or appliances, then photograph and video everything before anything moves, then notify your insurer. Extraction starts after that. The fifteen minutes spent documenting cannot be recovered later and everything else can.
How long does water damage clean up take?
Extraction and removal usually take one day. Structural drying commonly runs three to five days on a contained clean-water loss, and considerably longer for hardwood, plaster or concrete. Completion is decided by moisture readings matching unaffected material, not by a fixed number of days.
Can I do water damage clean up myself?
For a small clean-water spill on hard flooring caught immediately, yes. Once water has reached carpet, gone under a floor covering, reached the base of a wall, covered more than roughly a room, or was contaminated in any way, no. Household fans move air without removing humidity, and removing humidity is the job.
Why do they remove the drywall instead of drying it?
Plasterboard wicks water upward and holds it in the paper facing, and it hides wet insulation behind it that cannot be dried in place. On clean water caught quickly it is often dried instead. On contaminated water, or where insulation behind it is saturated, cutting a line above the tide mark is faster and verifiable.
Does the water category really change within two days?
Yes. Clean water in contact with building materials and contents, at room temperature, degrades toward a contaminated loss within roughly 24 to 48 hours, and water standing beyond about 72 hours is commonly treated as grossly contaminated whatever its origin. That changes what can be saved, not just how long the work takes.
How do I know the drying is actually finished?
Ask for the final reading sheet. Every affected material should have been read daily against a baseline taken on the same material in an unaffected part of the building, and the final readings should match that baseline. Equipment running in a room is not evidence of anything on its own.
What does water damage clean up cost?
That is covered in full on our water damage restoration cost page, which breaks mitigation and reconstruction apart and explains why the water category moves the figure more than the affected floor area does. This page deliberately covers the procedure rather than the pricing.
Sources
- Institute of Inspection, Cleaning and Restoration Certification, ANSI/IICRC S500 Standard for Professional Water Damage Restoration, 5th edition, 2021. Source of the water category and class framework, the principle that drying is verified against unaffected material, and the removal-against-drying decision for porous materials. The standard text is sold by IICRC; we describe its framework rather than reproduce it.
- Ready.gov flood safety guidance, United States Department of Homeland Security, on safety when entering flooded spaces and on electrical hazards in standing water. Retrieved 23 September 2026.
- Material removal and drying decisions describe common professional restoration practice driven by porosity and water category. Individual decisions belong to the contractor on site after a moisture survey.
- Drying durations shown in the chart are INDICATIVE, included to show the relative difference between materials rather than to predict any specific job. They are not survey results and no drying-time survey was conducted.
- Pricing for any of the work described here is covered separately on our water damage restoration cost page, where the sources and the indicative status of every range are set out.